Pages

.

Gobi Matar/ Cauliflower And Peas Curry


          Another curry that I make often these days, is this Gobi Matar/ Cauliflower And Peas Curry, the reasons being, this curry goes well with both rotis and rice, super easy to prepare and tastes very good. To add to all the above and the most important, my daughter, who's not a big fan of this vegetable, except in Pakoras/ Fritters and Manchurians ( both deep fried)  likes cauliflower cooked this way, which is much more healthier. It's not a gravy, it would fall between semi-dry to dry curry. If you have leftovers, you can very well use it as a filling for a very tasty sandwich the next day..

Need To Have

  • Cauliflower - 1 medium head
  • Fresh Or Frozen Green Peas - 1 cup
  • Tomatoes - 2, pureed
  • Grated Ginger - 1 tablespoon
  • Grated Garlic - 4 cloves
  • Turmeric Powder - 1/4 teaspoon
  • Red Chilly Powder - 1/2 teaspoon
  • Coriander Powder - 2 teaspoons
  • Garam Masala - 1/2 teaspoon
  • Cumin Seeds - 1 teaspoon
  • Salt - to taste

Method


          Cut the cauliflower into medium size florets, wash, blanch and keep. Heat some oil, add the cumin seeds. When it starts sizzling, add the grated ginger and garlic, and saute for about 2 minutes, till the raw smell goes away. then add the cauliflower pieces ( came to about 5 cups) and saute for 2 more minutes.


          Then add the turmeric, chilly and coriander powder and the salt, mix it well. Add the peas and tomato puree and about 1/4 cup of water, cover and cook till the vegetable is done. Open the lid, add the garam masala and keep mixing till most of the moisture dries up. Serve it warm with rotis.


Note
The cauliflowers here in India are pretty tough, so after blanching, they are just half cooked, the ones available in the US, would be cooked by then, so just wash in hot water and cook accordingly.
You can cook the peas separately and add at the end for bright green color.
reade more... Résuméabuiyad

Vegan Chocolate Chunk Cookies


          Chocolate Chip Cookies, though I have baked it a couple of times, never blogged it, so I thought it's high time that I added this to my bakes. I had initially thought of doing it as half oil and half butter version, but then I had bought some tofu the previous day and I wanted to use it, so went ahead and made a vegan version. To tell you the truth, I was not sure of the result, made a very small batch of just 7 cookies, ready to trash it, if something went wrong. But at the end, they turned out to be really very good, soft and guey, otherwise I wouldn't be blogging it, right. Since I ran out of chocolate chips, I've replaced it with chocolate chunks, hence the name Chocolate Chunk Cookies..

Need To Have

  • All Purpose Flour - 1/2 cup
  • Powdered Sugar - 1/6 cup
  • Chopped Chocolate Chunks - 1/6 cup
  • Oil - 21/2 tablespoon
  • Baking Powder - 1/8 teaspoon
  • Baking Soda - 1/8 teaspoon
  • Vanilla Extract - 1/4 teaspoon
  • Crumbled Tofu - 1 tablespoon
  • Water - 1/2  teaspoon

Method


          Sift together the flour, baking soda and baking powder. Take the oil and sugar and beat well, add the vanilla extract, salt, followed by the sifted flour and tofu.


          Bring it all together to form a dough, at this point, if needed, add the 1/2 teaspoon of water. Finally mix in the chocolate chunks. Divide into 6 or 7 portions, shape it into balls and flatten it slightly. Bake them at 180C for 15 to 20 mins. Let it cool and remove.


Note
The next time I am baking this, I am going to reduce the oil, since once I added the chocolate chunks, the dough became pretty oily, I think it's because of the cocoa butter in the chocolate, if you are using chocolate chips, I think this amount of oil should be fine.
The baking time should vary anytime between 15 to 20 mins, remove the cookies, when it's still soft, it hardens as it cools.
The cookies stay good for 2 to 3 days, after that they tend to harden a bit, also after 3 days, better to refrigerate since it has tofu. 
reade more... Résuméabuiyad

Vazhaithandu Poriyal/ Banana Stem Curry


         The pith or the inside part of the banana stem has many medicinal benefits. Whenever I find a good piece of it, I buy it, at least once in 2 or 3 weeks, I know and do only a couple of dishes with it, one is this Vazhaithandu Poriyal and the other is the Thayir Pachadi ( with yogurt/ curd). I have to learn some more dishes with this vegetable or stem. This is my mother's recipe, the tuvar dal and coconut added gives a nice taste to this curry, try it out, when you get a chance to get this vegetable..

Need To Have

  • Vazhaithandu/ Banana Stem - cleaned and chopped, 2 cups
  • Tuvar Dal/ Split Pigeon Peas - 2 tablespoons
  • Green Chillies - 2, sliced
  • Turmeric Powder - 1/4 teaspoon
  • Mustard Seeds - 1/2 teaspoon
  • Urad Dal/ Black Gram - 1 teaspoon
  • Asafoetida - 1/4 teaspoon
  • Grated Coconut - 2 tablespoons
  • Curry Leaves - 10
  • Salt - to taste

Method


          The banana stem looks like a white log, with layers of rind surrounding the smooth interior, we can just make slits and remove the rinds easily, till you get a smooth log.


          Now slice it, after each slice, wipe and remove with your finger, the fiber that comes after each slice. Keep the slices immersed in water.


          Once you have sliced the entire log, chop them and keep in water. Soak the tuvar dal in water for an hour, drain and keep.


          Heat some oil, add the urad dal and mustard seed, when it starts spluttering, add the asafoetida, green chillies and curry leaves, mix and add the chopped vazhaithandu and soaked lentils.


          Mix, add the turmeric powder, salt and 1/4 cup water, cover and cook on medium heat, till both the vegetable and the dal gets cooked. Then add the grated coconut, mix and serve as a side dish with rice and dal or sambar.


Note
You can prepare the vegetable the previous day, keep it soaked in thin buttermilk, in the refrigerator, then cook it the next day.
You can cook the tuvar dal separately and add, but it should be cooked but not mushy.
You can add a chopped onion along with the green chillies, saute for a minute and then add the vegetable.
reade more... Résuméabuiyad

Quinoa Patties With Chickpeas Gravy


          Many of us are familiar with the famous Ragda Patties, this is a slight healthy twist to this delicious dish. Ragda is the chickpeas or peas gravy that is served with the potato patties. Here I have reduced the potatoes and replaced it with the healthy quinoa and sauteed cabbage, they tasted really awesome. The chickpeas gravy that I have used here is slightly different, in that I have added some tamarind and jaggery, to give it a sweet and sour taste. The Quinoa Patties, topped with the Chickpeas Gravy, with a sprinkle of sliced onions and green chutney, made up for a wholesome and healthy meal, try this next time you cook quinoa..

Need To Have
For The Patties

  • Quinoa - 1/2 cup
  • Potatoes - 2 medium, boiled and mashed, came to 1 cup
  • Shredded Cabbage - 2 cups
  • Grated Ginger - 2 teaspoons
  • Turmeric Powder - 1/4 teaspoon
  • Red Chilly Powder - 1/2 teaspoon
  • Coriander Powder - 2 teaspoons
  • Asafoetida - 1/4 teaspoon
  • Garam Masala - 1/4 teaspoon
  • Salt - to taste

For The Chickpeas Gravy/ Chole

  • Chana/ Chickpeas - 1 cup
  • Tamarind - 1 large grape size
  • Turmeric Powder - 1/4 teaspoon
  • Red Chilly Powder - 1/2 teaspoon
  • Coriander Powder - 2 teaspoons
  • Jaggery - 1 teaspoon
  • Cumin Seeds - 1 teaspoon
  • Cloves - 2

To Grind

  • Onion - 1 small
  • Tomato - 1 medium
  • Cooked Chickpeas - 2 tablespoons
  • Garlic - 3 cloves
  • Ginger - 1" piece

To Assemble

  • Quinoa Patties
  • Chickpeas Gravy
  • Sliced Onions
  • Green Chutney ( store bought or home made)

Method
Quinoa Patties


          Cook 1/2 cup quinoa as per the instructions on the bag or refer here, it should be cooked, but not mushy, cool it. Heat some oil, add the cabbage and salt, and saute it till it's cooked but still retains a little bit of the crunchiness.


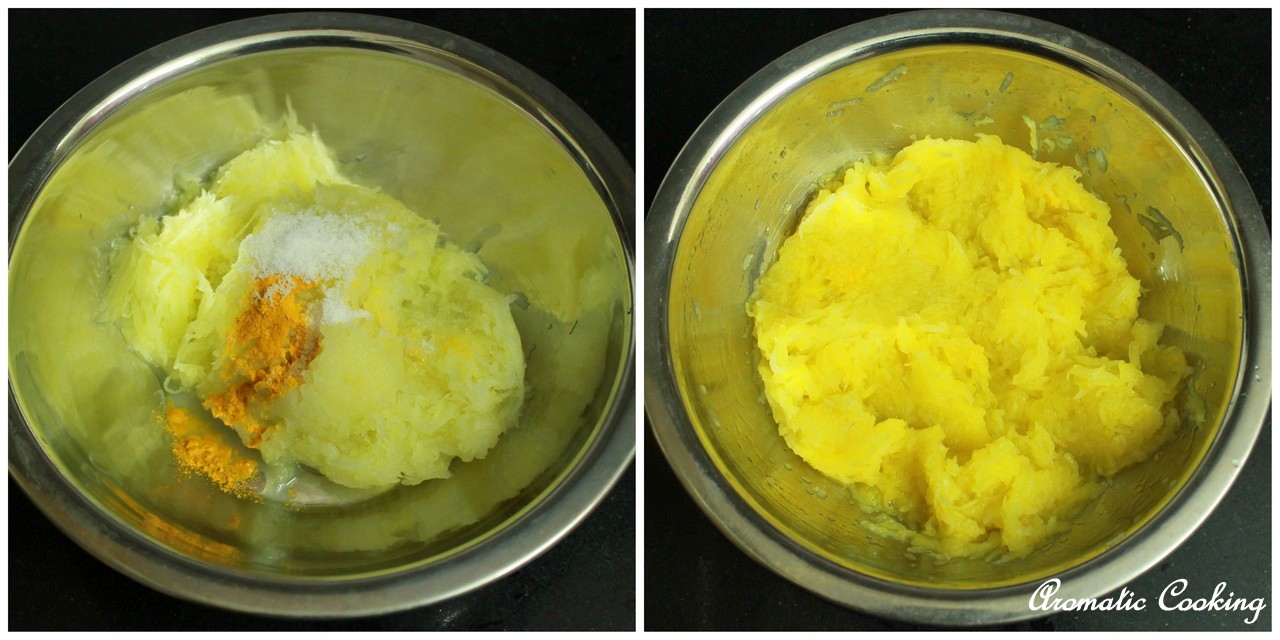
          Now in a bowl, take the cooked quinoa, mashed potatoes, sauteed cabbage, grated ginger, turmeric, red chilly and coriander powders, asafoetida, garam masala and salt. Mix it well with your hand, and shape into small patties, I got 16 patties.


          Heat some oil, and shallow fry the patties till golden brown on both sides, remove and drain the excess oil.

Chole/ Chickpeas Gravy


          Pressure cook the chickpeas with salt, till soft, it takes about 8 to 10 minutes in the pressure cooker. Grind together all the ingredients given under ' to grind '. Soak the tamarind in 1 cup hot water, squeeze and take the extract, strain and keep.


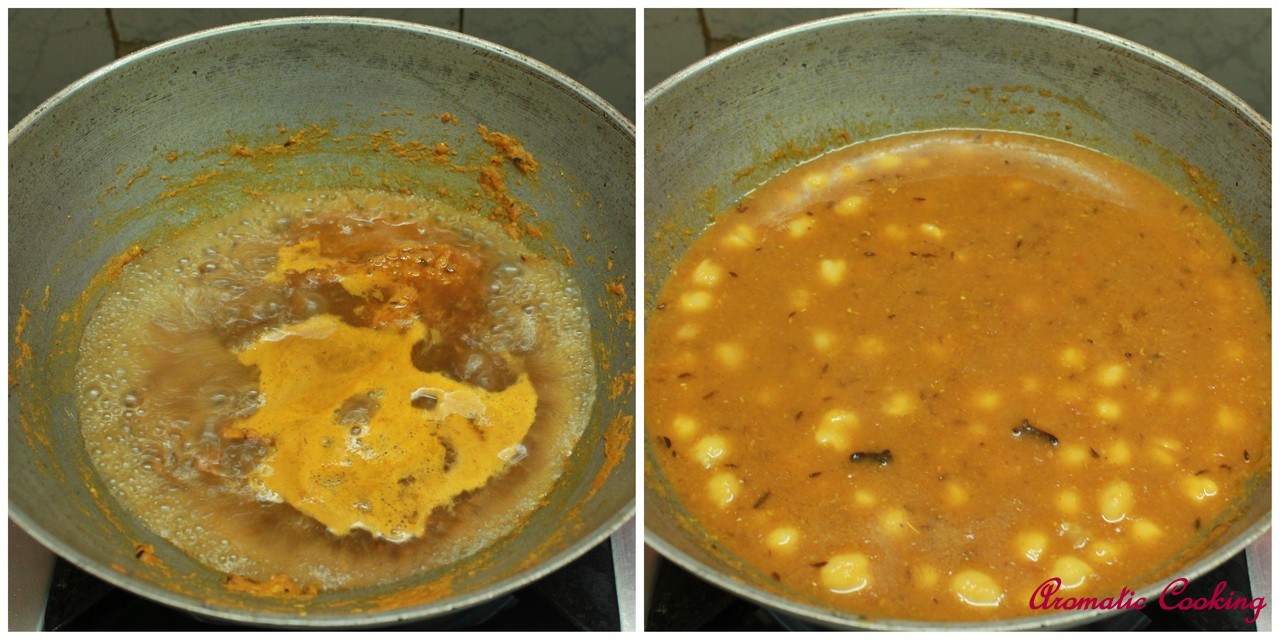
          Heat some oil, add the cloves and cumin seeds, when it starts sizzling, add the ground paste, turmeric, chilly aand coriander powders and salt, saute it on medium heat for 5 to 7 minutes, till the raw smell goes away, if it sticks to the pan, sprinkle some water and keep sauteing.


          Now add the tamarind extract, mix well, then add the cooked chickpeas and the jaggery, if needed another half cup of water and simmer for another 7 to 10 minutes, now your chickpeas gravy is ready.


To Assemble
          Place 2 or 3 patties, pour a little chickpeas gravy on the side and top, top it with the sliced onions and the green chutney. Do this just before serving.

Sending this To Zesty South Indian Kitchen for the Hearth And Soul Blog Hop event and
                    To My Culinary Trial Room for the Hearty And Healthy event.


Note
The patties can be made ahead of time and can be warmed in the oven or on stove top, just before serving, even the chickpeas gravy can be made the previous day and refrigerated.
If the quinoa is overcooked, then the whole dish will become very mushy, then you'll need other dry ingredients like bread crumbs to bring it together.
Generally they also serve a sweet tamarind or date chutney along with the green chutney, but I don't find the need here, since I have added the tamarind and jaggery to the chickpeas gravy itself.
You can serve this as a snack or appetizer or also as a complete meal by itself.

reade more... Résuméabuiyad

Coriander Chutney/ Green Chutney


          Chat Dishes are very popular in Indian Cuisine, it has it's origin in the northern states, but now popular throughout India and almost everywhere in the world. If you can find a Indian restaurant in your area, I am sure you'll find some kind of a chat in the menu. It's mostly served as a snack or an appetizer. Most often they are served with some chutneys, one of them is today's Coriander Chutney, this is also served as a side to the plain pappads. Can also use as a spread on sandwiches and keeps good for one week in the refrigerator..

Need To Have

  • Chopped Coriander - 1 cup
  • Chopped Ginger - 1 teaspoon
  • Green Chilly - 1
  • Capsicum Pieces - 1 tab
  • Lemon Juice - 11/2 teaspoon
  • Salt - to taste

Method


          Take all the ingredients in a blender and grind it adding a little water, well that's it.


Note
The lemon juice is added not only for tartness, but also to retain the rich green color, also I read that you can add a little oil to keep the color.
My friend makes it in bulk, stores in small containers in the freezer, the right amount for a meal, this way the chutney stays green and fresh.
For the above quantity, I got 1 small ramekin of chutney, which was more than enough for three of us for a meal.
Again the capsicum pieces is added for nice color, a tip from my friend.
reade more... Résuméabuiyad

Methi Thepla/ Flat Breads With Fenugreek Leaves


          My last post was Mango Chunda/ Chutney, and I had mentioned there, that, I had made Methi Theplas to go with it or vice versa. Theplas are basically flatbreads made with a dough which is made of wheat flour and yogurt/curd along with some spices. Though I had tasted it a couple of times, I really fell in love with it, when I tasted them at my friend's place, her mother had made them and brought with her when she had travelled from India to the US. They tasted simply too good, and I didn't hesitate a moment to ask her the recipe. I made it last week for lunch along with the Chunda and we simply loved it..
Need To Have
  • Whole Wheat Flour - 1 cup
  • Chopped Methi/ Fenugreek Leaves - 1/2 cup
  • White Sesame Seeds - 1 teaspoon
  • Yogurt/ Curd - 1/4 cup + 2 or 3 teaspoons
  • Turmeric Powder - 1/4 teaspoon
  • Red Chilly Powder - 1/4 teaspoon
  • Coriander Powder - 1/2 teaspoon
  • Salt - 1/4 teaspoon
  • Sugar - 1/4 teaspoon
  • Asafoetida - 1/4 teaspoon
Method


          Take the flour, fenugreek leaves and sesame seeds in a bowl and mix it. In another bowl, take the 1/4 cup yogurt ( warmed for 20 secs in the microwave), add the turmeric, chilly and coriander powders, salt, sugar and asafoetida, mix it nicely. 


          Now add this to the flour and bring it together to form the dough, at this point you might need the extra 2 or 3 teaspoons of extra yogurt to get a nice smooth and soft dough. Apply some oil and leave it covered for at least 30 minutes. Divide them into 8 portions. Dusting some flour, roll them into thin discs. 


          Place it on a hot skillet, when you notice it bubbling up slightly, flip it, brush some oil and flip it immediately. Brush some oil on the second side, and once the first side gets light brown spots, flip it one last time and cook the other side till it gets the brown spots. Stack the theplas, one over the other, this way they retain their softness. Serve it warm with some Chunda or any side dish of your choice.


Note
Fresh or frozen fenugreek leaves are available in Indian grocery stores, both work well for making these theplas, if you don't find them, replace them with spinach and some kasuri methi/ dried fenugreek leaves.
My red chilly powder is really spicy, you can add a little more if needed.
While making the theplas, flip it only thrice like I have mentioned, that way you'll get softer theplas.
reade more... Résuméabuiyad

Mango Chunda/ Chutney


          Mango Chunda, a sweet and spicy chutney, I don't remember when I first tasted this, I think, I had it with some parathas at a friend's place. It's a Gujarati dish, traditionally served with theplas and parathas, and it's prepared with raw mangoes and has a sweet and spicy taste. While reading about it, I came to know, that the traditional way of making this, is really a lengthy process, where the grated mango is mixed with sugar and left to melt naturally under the sun, and then the spice powders are added. But I tried this easy version from Tarla Dalal's recipe collection, and the result was awesome. Now I have a small jar of it, which can be used for at least a year, that is, if it's not finished by then, a tasty accompaniment for any paratha or even as a spread on a slice of bread..

Need To Have

  • Raw Mango -1 grated, came to 1 cup
  • Sugar - 11/2 cups
  • Red Chilly Powder - 2 teaspoons
  • Roasted Cumin Powder - 1 teaspoon
  • Turmeric Powder - 1/4 teaspoon
  • Salt - 1 teaspoon

Method


          Add the turmeric powder and salt to the grated mango, mix well and leave it for 15 minutes.


          Then add the 11/2 cups of sugar, a little at a time, about 2 tablespoons, mix, leave for a minute or two and repeat, do this over a period of 30 to 35 minutes, till all the sugar is mixed with the grated mango.


          Heat a pan, add the mango mixture, keep stirring on low heat for 3 to 4 minutes, till the sugar is completely dissolved and it starts bubbling up. At this stage, switch off and cool it completely.


          Once it's cooled, add the chilly powder and roasted cumin powder and mix well. Store this in clean jars, in a cool dry place. We had it with some methi theplas.


Note
Don't dump all the sugar at once, doing it this way is supposed to replace the original method of leaving it in the sunlight to melt.
For roasted cumin powder, just roast some cumin seeds and crush it in a mortar or a blender.
The original recipe called for 3 teaspoons of chilly powder, I've reduced it to 2, since my chilly powder is very spicy, I would advise you to taste while mixing.
Though the chunda can be left outside in a cool, dry place, I have refrigerated it, can't trust the Chennai hot weather.
reade more... Résuméabuiyad

Vegan Chocolate Mug Cake


          Chocolate Mug Cake, finally I got to post it, and a vegan version. I've tried it so many times, sometimes it had turned out good and then sometimes, like a flab of rubber that I had to throw away. It was when I was making the Eggless Cauldron Cakes, I had some leftover batter, that I poured in some ramekins and microwaved, it came out very well, so I stuck to that. Then yesterday, I tried a vegan version, using orange juice and oil, the result was very good, ideal for those days, when you want a chocolate cake, but then, lazy to bake a big one..

Need To Have

  • All Purpose Flour - 3 tablespoons
  • Sugar - 2 tablespoons + 1 teaspoon
  • Hershey's Unsweetened Cocoa Powder - 11/2 tablespoons
  • Baking Soda - 1/4 teaspoon
  • Orange Juice - 2 tablespoons + 2 teaspoons
  • Oil - 21/2 teaspoons

Method


          Take all the dry ingredients in a mug, add the juice and oil, whisk it well.


          Microwave it for about 1 minute 45 seconds to 2 minutes. Let it cool and enjoy.


Note
I've given the time from 1 min 45 secs to 2 mins because it might vary with microwaves.
Don't microwave it too long, the cake will lose all the moisture and turn out very dry.
The cake batter should be thinner than that we use when we bake in a regular oven.
The sugar level was fine for us, if you like your cake very sweet, then add a teaspoon more.
Remove it while the cake is still moist, it dries up, as it cools.
I've used a small mug, so that the cake would come to the top ( for photos), so I had to keep an eye that it didn't overflow, the batter usually bubbles up, but finally it doesn't over flow, if needed, stop and start the microwave.
reade more... Résuméabuiyad

Tomato Capsicum Dal/ Lentils


          Dal/ Lentils is the main source of protein in a vegetarian diet, but eating the same old dal or sambar every single day can become a little boring. Adding a different vegetable or slightly tweaking the spices added can result in very different flavors, this Tomato Capsicum Dal is one such attempt. The capsicum, fenugreek, coconut and jaggery added makes this dal taste different from the usual and it goes well both with rice and rotis, give it a try, you might like it..

Need To Have

  • Tuvar Dal/ Split Pigeon Peas - 1/4 cup
  • Tomatoes - 2 medium, chopped
  • Capsicum - 1, chopped
  • Turmeric Powder - 1/4 teaspoon
  • Red Chilly Powder - 1/2 teaspoon
  • Coriander Powder - 2 teaspoons
  • Grated Coconut - 1 tablespoon
  • Jaggery - 1 teaspoon
  • Asafoetida - 1/4 teaspoon
  • Urad Dal/ Black Gram - 1 teaspoon
  • Mustard Seeds - 1/4 teaspoon
  • Fenugreek Seeds - 1/4 teaspoon
  • Chopped Coriander - 1 tablespoon

Method


          Pressure cook the tuvar dal with water and turmeric powder, mash slightly and keep. Heat some oil, add the urad dal, mustard seeds, when it starts popping, add the fenugreek seeds and the asafoetida. Just as the fenugreek seeds start changing color, add the chopped capsicum pieces and saute for about 2 minutes. Then add the chopped tomatoes and mix for a minute.


          Add the chilly and coriander powders, coconut and jaggery, mix for another minute till the tomatoes turn mushy. Now add the cooked dal and about 2 cups of water, bring it to a boil and simmer for about 5 minutes. Finally, add the chopped coriander and switch off.


Note
You can also use a mixture of tuvar dal and chana dal/ split chickpeas.
Make small batches of coriander powder, it loses its flavor very fast.
reade more... Résuméabuiyad

Paneer Butter Masala/ Creamy Curry With Indian Cottage Cheese


          Paneer Butter Masala, a favorite of most kids, a rich creamy dish, and is sure to appear in most party menus. Paneer/ Indian Cottage Cheese cubes are cooked in a rich blend of spices and is garnished with kasuri methi/ dried fenugreek leaves and a dash of fresh cream, the resulting flavor is simply irresistible. Though the dish looks so rich and delicious, it's actually pretty easy to make it. You can make your own paneer ( the method here ) or use store bought ones, both works very well..

Need To Have

  • Paneer Cubes - 11/2 cups
  • Kasuri Methi - 2 tablespoons
  • Fresh Cream - to garnish
  • Oil & Butter - as needed
  • Salt - to taste

To Grind

  • Onion - 1 medium, chopped
  • Tomatoes - 2 cups, chopped
  • Chopped Ginger - 2 teaspoons
  • Garlic - 5 small cloves
  • Cashews - 2
  • Golden Raisins - 6 small
  • Turmeric Powder - 1/4 teaspoon
  • Red Chilly Powder - 1 teaspoon
  • Coriander Powder - 2 teaspoons
  • Cinnamon - 1" piece
  • Cloves - 2
  • Cardamom - 1
  • Javentri - a small piece

Method


          Heat some oil and stir fry the paneer cubes, remove and drain to remove excess oil.


          For the paste, heat a little oil, add the cinnamon, cloves, cardamom and javentri ( the orange flower like thing in the first picture). When it starts sizzling and the elaichi or cloves pop, add the onions, garlic and ginger and saute for about 2 minutes.


          Now add the tomatoes, saute still it starts turning mushy, then add the turmeric,chilly and coriander powders, mix for a minute, remove and cool.


          Grind this along with the cashews and raisins, now your paste is ready.


          Heat some butter and oil, add the ground paste and salt and saute it well for about 3 minutes, if it sticks, add a little water and keep sauteing.


          Once you get a nice flavor, add the paneer cubes, about  2 cups of water, kasuri methi, cover and cook for about 5 minutes. Then remove and add the fresh cream, serve it warm with some rotis or naan.


Note
Sometimes, store bought paneer turns a little rubbery when stir fried, to avoid this soak it in some warm milk after frying, till adding it to the curry.
Since it's paneer butter masala, I've added butter, but you can leave it also, it'll still taste good.
Kasuri Methi is available in all Indian stores.
reade more... Résuméabuiyad